
Do You Speak Dough? 7 Things Your Sourdough Is Telling You During Bulk Fermentation
Bulk fermentation is the step most bakers find hardest to read. Is it done? Did I miss it? Why is my loaf gummy when I followed the recipe to the minute? After the starter phrasebook, here is the dough phrasebook. Seven things your dough does during bulk fermentation, what they mean, and what to do about each one, translated with the answers from my free book The Sourdough Framework. This post goes deeper than the infographic.
Last updated: October 19, 2026.
The short version
- 4 hours in, barely grew: not done. Recipe times come from someone else’s kitchen. Watch the dough, not the clock.
- The test jar is up 50 %: a small sample in a straight jar grows with your dough. When it reaches your target, so has the dough.
- Tiny bubbles on top: the dough is inflated with gas. Time to shape.
- Smells like your starter: ready when it smells like a ripe starter just before it collapses.
- Tacky, not sticky: ready. Overly sticky means it went too far.
- Spreads, sticky, bubbles gone: too far, but not ruined. Bake it in a loaf pan.
- Baked, gummy, big holes: not underproofed. The bulk fermentation was too short.
The phrasebook
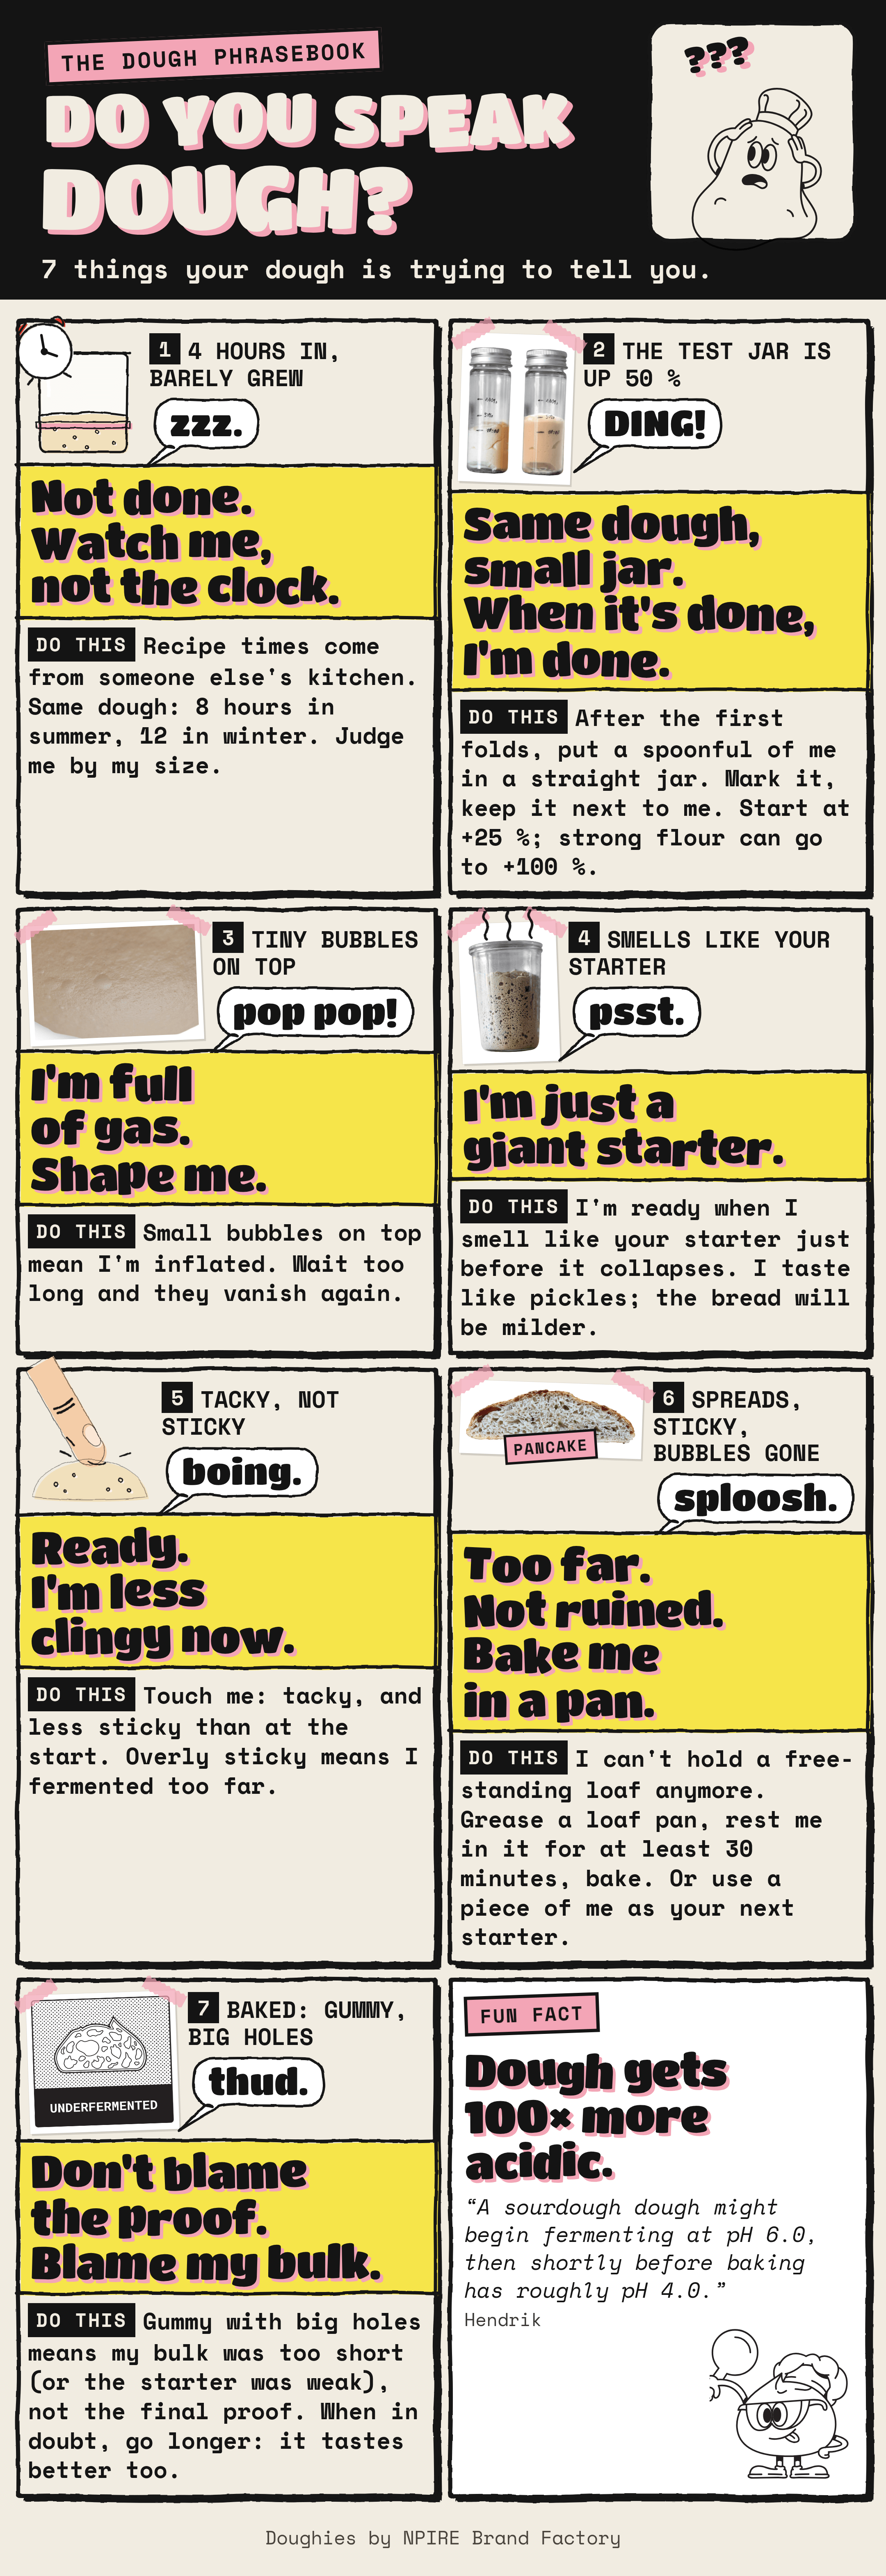
You are welcome to share it. A tag or a link back to this page is appreciated. Tap the image for the full size version.
All seven at a glance
| What you see | Your dough says | Translation | Do this |
|---|---|---|---|
| 4 hours in, barely grew | zzz. | Not done. Watch me, not the clock. | Judge by size, not by the recipe’s time. |
| The test jar is up 50 % | DING! | Same dough, small jar. When it’s done, I’m done. | Shape when the sample hits your target. |
| Tiny bubbles on top | pop pop! | I’m full of gas. Shape me. | Shape before the bubbles vanish. |
| Smells like your starter | psst. | I’m just a giant starter. | Ready when it smells like a starter at its peak. |
| Tacky, not sticky | boing. | Ready. I’m less clingy now. | Overly sticky means too far. |
| Spreads, sticky, bubbles gone | sploosh. | Too far. Not ruined. Bake me in a pan. | Greased loaf pan, at least 30 minutes, bake. |
| Baked: gummy, big holes | thud. | Don’t blame the proof. Blame my bulk. | Next time, a longer bulk. |
1. 4 hours in, barely grew: “Watch me, not the clock.”
The recipe said four hours. The four hours are over, and your dough looks almost the same as when you mixed it.
The worst thing you can do when fermenting sourdough is to rely on a recipe’s timing. In my experience it is wrong for you in almost every case. The writer of the recipe has a different flour, a starter with a different level of activity, and a kitchen with a different temperature. A small change in any one of them changes the whole schedule, and one or two hours make the difference between a dough that did not ferment long enough and a sticky, fermented pancake. The same dough might be ready after 8 hours in summer and easily need 12 hours in winter.
This is also one of the reasons bakeries prefer doughs with commercial yeast only. Without the bacteria, fermentation is much more predictable and the room for error is much larger.
Do this: treat the recipe’s time as a rough guide and judge the dough by its size. A see-through container with a mark at the starting level, or the test jar from the next card, tells you more than any clock.
2. The test jar is up 50 %: “When it’s done, I’m done.”
Experienced bakers judge the dough by look and feel. That works after hundreds of loaves, not on your first ten. My go-to method for beginners is an aliquot jar: a small sample of your dough that ferments along with the main dough.
How to set it up:
- Build the first dough strength, then take a spoonful of the dough.
- Put it into a straight-sided, cylindrical jar and mark the level. In a jar that gets wider at the top, you cannot judge the increase.
- Keep the jar right next to your dough. Some bakers even put it into the same container.
How much it should grow depends on your flour. A flour with more gluten can ferment longer. Around 80 % of your wheat flour’s protein is gluten, so check the protein on the package:
| Flour protein | Size increase to aim for |
|---|---|
| 8 to 10 % | 25 % |
| 10 to 12 % | 50 % |
| 12 to 15 % | 100 % |
| more than 15 % | more than 100 % |
The value is highly variable. I recommend starting at 25 % and testing up to 100 % over your next bakes, then keeping the value you are happy with.
Where the jar gets it wrong. The sample is small, so it reacts faster to temperature than your dough. If you mix with warm water, the jar cools down faster and lags behind. If you mix with cold water, it warms up faster and runs ahead, and you stop too early. So use room-temperature water. The jar is also less reliable when your kitchen’s temperature changes a lot during the day, and for very large doughs of more than 10 kg of flour, which warm themselves up while they ferment. If your dough rises and the jar does not, that temperature difference is most likely the reason. Mark a see-through container instead.
The photo on the poster is mine: it took 10 hours for that dough to reach a 50 % size increase.
3. Tiny bubbles on top: “Shape me.”
Small bubbles on the surface of your dough are a good sign. They tell you the dough is inflated with gas. The further you push the bulk fermentation, the more bubbles appear.
There is a limit. If you overdo it, the dough becomes leaky, and the bubbles disappear again. That is card 6.
Do this: when you see small bubbles on top and the dough has reached its size target, divide and pre-shape, or shape directly.
4. Smells like your starter: “I’m just a giant starter.”
Your dough is nothing but a gigantic starter: the same microbes doing the same work, with more flour, water and salt around them. So it smells like one. At the end of bulk fermentation it should smell like your ripe starter shortly before it collapses.
You can also taste a little of the dough. It tastes like pickled food, and the more acidic it is, the further the fermentation has gone. Don’t worry about the sourness: the baked bread tastes milder than the raw dough, because some of the acidity leaves the bread while it bakes. The longer you bake, the less sour the loaf. The Sourdough Thermometer explains what happens at which temperature.
Do this: smell your starter when it is at its peak and remember it. When your dough smells the same, it is ready.
5. Tacky, not sticky: “I’m less clingy now.”
Touch your dough. At the end of bulk fermentation it should feel tacky on your hands, and less sticky than in the earlier stages. If it turns overly sticky, the fermentation has gone too far.
Part of the change comes from the dough strength you build: the more strength, the less sticky the dough. And a dough with a lot of water always stays stickier than a stiff one. So compare your dough with itself, not with a photo, and read this sign together with the size and the bubbles.
Do this: touch the surface briefly. Tacky and ready to let go of your fingers: shape. Clinging like glue after it already felt smooth: it went too far, see the next card.
6. Spreads, sticky, bubbles gone: “Not ruined.”
The dough spreads in the bowl, the bubbles on top are gone, and it sticks to everything. It fermented too long.
Here is what happened. Over time, an enzyme called protease breaks down the gluten in your flour, and the bacteria consume gluten too. Bakers call it gluten rot. The gluten that normally traps the CO2 can no longer hold the gas, so it escapes. Baked free-standing, a dough like this flattens in the oven into what bakers call a pancake, with many tiny holes instead of an open crumb. That is the photo on the poster.
You won’t be able to bake a free-standing loaf with it anymore. But don’t worry.
Do this:
- Grease a loaf pan properly and move the dough into it. A spatula helps.
- Let it proof in the pan for at least 30 minutes, so the big cavities from the transfer even out. You can also push this proof to 24 or even 72 hours. The bread then gets an excellent, very tangy taste.
- Bake it.
Or use part of the dough as the starter for your next dough.
7. Baked: gummy, big holes: “Blame my bulk.”
You cut the loaf. The crumb is gummy, and there are large pockets of air, often called craters. Many bakers would now call the loaf underproofed.
Underproofed is not a good term for it. It only refers to a short final proof, the last rise before baking. Proofing makes the dough a bit more extensible and lets it inflate a bit more. But if you bake a dough after a perfectly timed bulk fermentation, it will not be underproofed even if you skip the final proof entirely. A gummy crumb with craters means that something went wrong earlier: the bulk fermentation was too short, or the starter was not strong enough to begin with.
Do this: next time give the bulk fermentation more time, and judge it by the signs above. When in doubt, go longer. I always push my dough more toward a longer fermentation: the bread tastes better than a pale, underfermented one.
The crumb on the poster comes from my crumb chart. If your crumb looks different, Debugging Your Sourdough Crumb shows the other common crumb structures and their causes.
Fun fact: your dough gets 100 times more acidic
A sourdough dough might begin fermenting at pH 6.0 and reach roughly pH 4.0 shortly before baking. The pH scale is logarithmic, so every step is ten times more acidic. Two steps make your dough 100 times more acidic than at the start.
You can use a pH meter to follow the fermentation. It is the most reliable method I know, once you have found the values that work for your starter, water and flour. It is also the most expensive one, and the meter needs regular calibration. For most home bakers the test jar does the job.
Your dough said something else?
The phrasebook covers the seven things bakers ask me about most during bulk fermentation. If your dough is saying something that is not on the list, ask Loafy, my free sourdough assistant. It answers from The Sourdough Framework and names the chapter, and when the book does not cover a question, it says so instead of guessing. If you are baking your first loaf, the free Bake Sourdough Bread guide walks you through it step by step.
Sources
Every translation comes from my free book The Sourdough Framework:
- Chapter 7, Wheat sourdough: Bulk fermentation, the aliquot jar, the dough at the end of bulk fermentation and the dough’s pH during bread preparation.
- Chapter 12, Troubleshooting: Debugging your crumb structure, Underfermented, Overfermented and My dough sample (aliquot) doesn’t rise.
Keep reading
- Do You Speak Starter?: the starter phrasebook, seven things your jar is telling you.
- Debugging Your Sourdough Crumb: what your crumb says about your bake.
- The Sourdough Thermometer: what your dough does at 12 temperatures, from fridge to oven.
Frequently asked questions
How do I know when bulk fermentation is done?
Judge the dough by its size, not by the clock. Bulk is done when the dough has grown by the amount your flour can take. My reference values are about 25 % for flour with 8 to 10 % protein, 50 % for 10 to 12 %, and 100 % for 12 to 15 %. Tiny bubbles on the surface, a smell like a ripe starter just before it collapses, and a dough that feels tacky instead of sticky confirm it.
How long should sourdough bulk fermentation take?
There is no fixed time. Your flour, the strength of your starter and the temperature all change it. The same dough can be ready after 8 hours in summer and need 12 hours in winter. A recipe's time only tells you how long it took in the writer's kitchen.
What is an aliquot jar?
A small sample of your dough in a straight-sided jar. Take it after you built the first dough strength, mark the level and keep the jar right next to your dough. When the sample has grown by your target, the main dough has too. Make the dough with room-temperature water, otherwise the small sample warms up or cools down faster than the bowl and gives you a false reading.
What does overfermented sourdough look like, and can I save it?
It turns overly sticky, the bubbles on top disappear again and the dough spreads instead of holding a shape. The gluten has broken down, so it cannot hold the gas anymore. It is not ruined. Bake it in a greased loaf pan after at least 30 minutes of rest in the pan, or use a piece of it as the starter for your next dough.
Is a gummy sourdough loaf with big holes underproofed?
Usually not. Underproofed only refers to a short final proof. A gummy crumb with big holes, often called craters, comes from a bulk fermentation that was too short, or from a weak starter. After a well-timed bulk, your bread would not be underproofed even if you skipped the final proof entirely.
Should sourdough feel sticky at the end of bulk fermentation?
It should feel tacky on your hands and less sticky than at the start. If the dough turns overly sticky, the fermentation went too far.
How sour is sourdough at the end of fermentation?
A dough might start fermenting at about pH 6.0 and reach roughly pH 4.0 shortly before baking. That is 100 times more acidic. The raw dough tastes like pickles, but the baked bread is milder, because some of the acidity leaves the bread while it bakes. The longer you bake, the milder the loaf.